6 minutes
Pico Drops
It's a box... with a button.
Another day, another overengineered solution to a problem that could be solved with a pencil and a piece of paper.
I have a slightly anoying condition which requires me to apply eye drops every night. It’s usually not a problem, I rarely forget and when I do, my wife reminds me. But some mornings I wake up thinking if I did put them the night before.
Enter Pico Drops!
For a while now, I’ve been sitting on two raspberry pico W, trying to figure out what to do with them. This was the perfect oportunity to use one and try out the microcontroller world.
My plan was to be able to press a button to signal the action I intended to register. As the eye drops expire after a month opened, bonus points were figuratively awarded if a long press of the button could signal a new bottle.
I decided to keep it simple for now and register this action via MQTT on home assistant. This way me or my wife can check the “drops status” and she can wake me up if there is a need.
The first problem arose with the “protocol”. In order for some smart features intended in the future, such as flashing a light after a certain hour, the raspberry pico needs to get the time from the network. That’s not a problem on the open internet, as NTP is in the equation. However, I have an isolated IOT network for home automation, not connected to the internet. This proved to be a problem, so for now the pico is connected to the general wifi, which has the added benefit of having a much better signal. There was another issue that required the use of NTP: home assistant sensors show the last received data, so sending that data already nice and pretty takes care of that. And surviving the last sensor state requires using a “retained” MQTT message, which will invalidate the message receive time of Home Assistant if there is a reboot (which there is frequently as I’m still tweaking my home server). So NTP and sending the correct time in the message is the way to go, for now.
On to the software!
Step 1 - The software (and hardware)
First, I chose micropython. Why? Because the challenge was getting the project ready, not learning C/C++. Micropython has very good support for the raspberry pico and I’m used to the language. I’d have liked to try out TinyGo, but it doesn’t have wifi support, so that was out of the question. I do hope it will, someday.
I grabbed the MQTT Simple library, the code to connect to a wifi from the raspberry pico W documentation, connected a WS2812 LED module, a pushbutton and the pico on the breadboard, connected through USB, opened up the IDE and started trying out things.
For simplicity sake (again), I decided to keep it all single threaded, and it worked quite nicely. The program loop checks the button state and when it’s pressed, the current time is registered. After the state changes again, a simple time comparison with a threshold signals a short or long press:
def get_press_type(pin, pressed_state):
    start_ms = ticks_ms()

    while True:
        sleep(0.1)
        if pin.value() != pressed_state:
            break

    end_ms = ticks_ms()

    sleep(0.1)  # Debounce

    if end_ms - start_ms > LONG_PRESS_MS:
        return "LONG"

    return "SHORT"
If you’re wondering why this is just a returned string, it’s because micropython doesn’t support enums. We’re keeping it simple here, this isn’t Netflix!
If a short press is detected, we try to connect to the wifi, send the MQTT message and signal a success with a LED sequence. If there was an error, we signal a failure.
def send_applied_drops_time():
    print("Send applied drops")
    led.set_color(2,2,2)

    try:
        connect_wifi(WIFI_SSID, WIFI_PASSWORD)
        ntptime.settime()

        time_str = get_utc_time()

        print("drops applied at", time_str)
        mqtt_send(f"{MEDICATION_NAME}/use", time_str)

        show_success()

    except Exception as exc:
        show_failure()
        print(exc)
Yes, the MQTT topic is hardcoded, so sue me (please don’t though).
The one thing I’m proud of in this code is actually the LED control. The led is driven by a library which can set the RGB values. I wrapped it in a helper class which can set a gradient and get called to update a color. Since the whole code is single threaded, we need the color update to be signaled from the main loop. If we create a new loop just for the gradient, no actions would be able to register while we stayed there.
But the best part is the color calculation, because it uses a sine wave! For most developers that would not be an issue but doctors don’t get to use trigonometry at work. I have to thank two websites which helped me a lot in this:
The first one helped me tweak the algorithm, the second one allowed me to check out what I was actually making. I ended up with this:
def sine_y(t, amplitude):
    m = (1 + sin(t * (2 * pi / amplitude) - (pi/2))) / 2
    return m
t stands for time (I can hear my wife shouting about single letter variables, don’t join in) and amplitude is the time it takes for a whole cycle of off-on-off to complete.
That’s it for the software, now we need a case!
Step 2 - The case
The case was surprisingly easy to make. The raspberry foundation has great documentation, so I just had to copy the pico dimensions, define some tolerance values, create a design and print it!
I went through a prototype which was very snug, only with enough room for the pico. This allowed me to check fit (it did) and realize I needed something bigger, both to fit the button and the LED, and to resist the cable tension, if the cable decided to try to rotate the box.
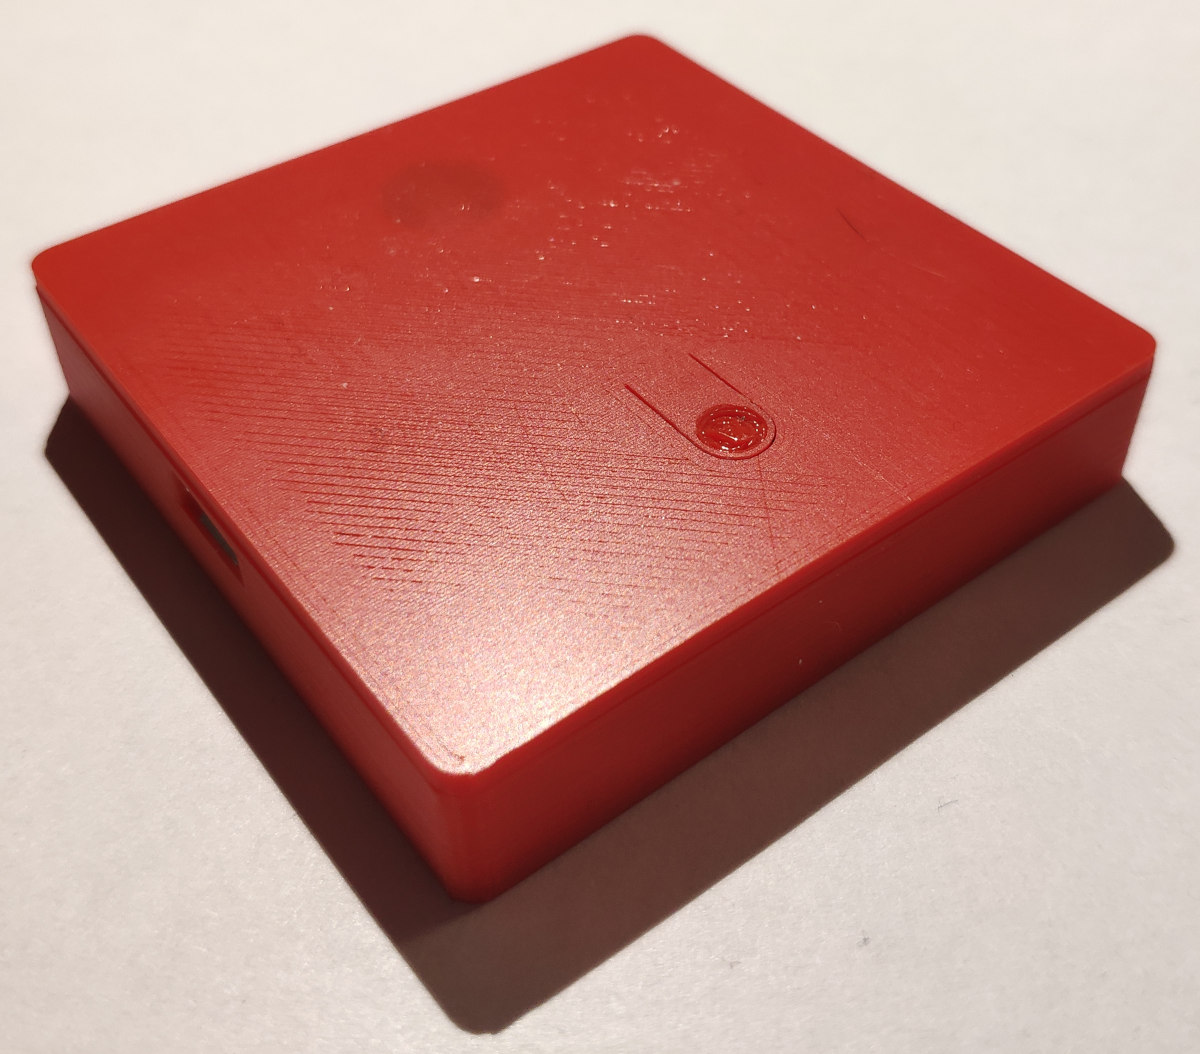
I went with a rounded box design, with a press fit lid with a cutout for the button and a one layer segment for the led to shine through. A few hours later I had this:
The press fit is not perfect, and should be improved, but I added a small ridge with hot glue which made it good enough. Everything is good enough.
The only other hardware was two m2 screws. There is room for four but that felt like overkill.
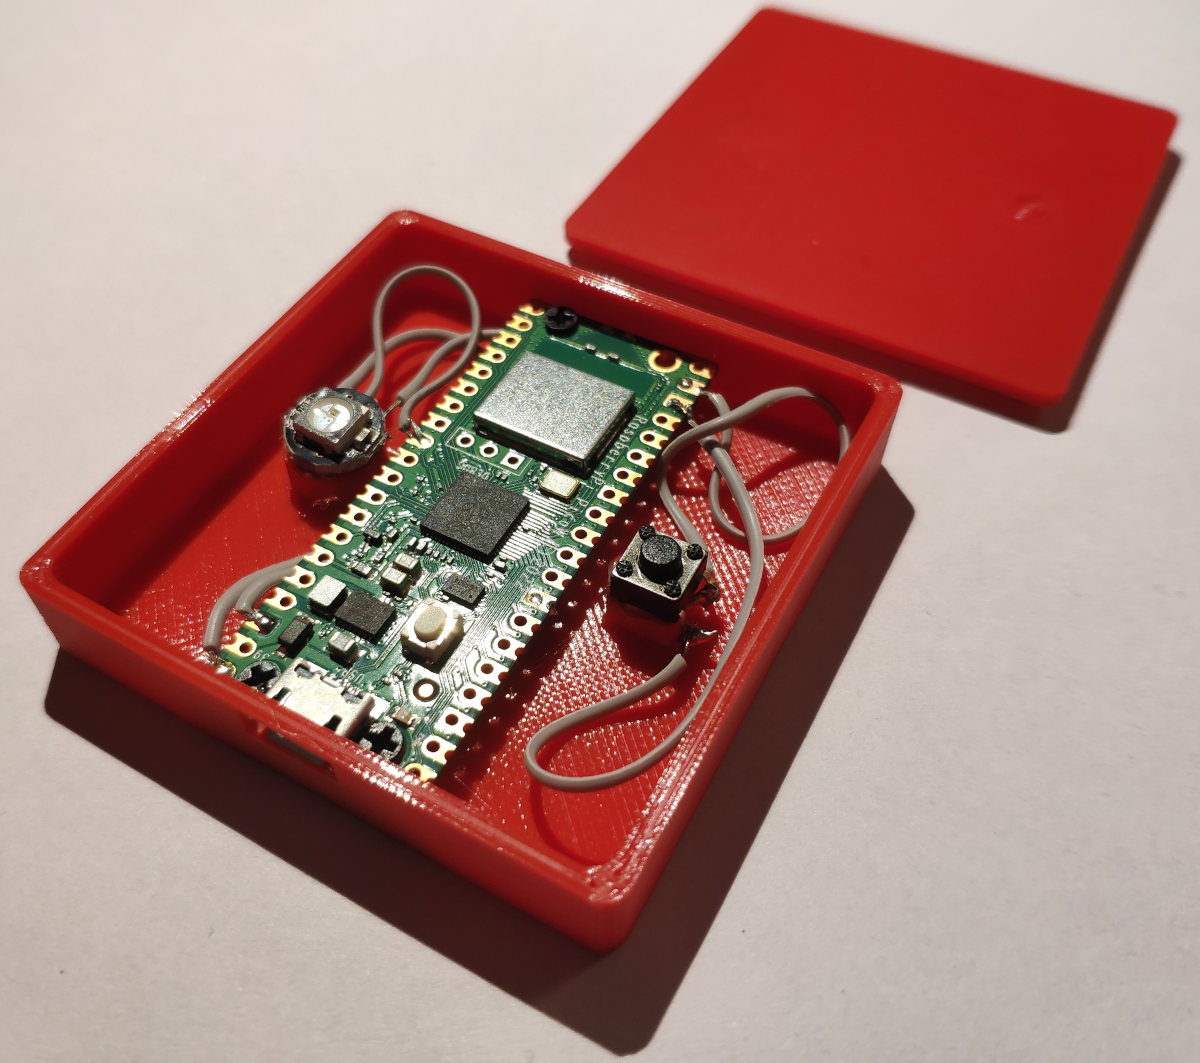
Maybe too much wire?
Step 3 - (Don’t) profit!
Everything has been working fine for more than a week! And now I get to press a button before going to sleep, like a pavlovian dog!
All kidding aside, this was a very fun project which had me touching different subjects. I have a bigger thing planned for the other pico W, but that will have to wait a while. My home server needs some attention, as usual.
If you want to check out my design and code, it’s available on Gitlab: https://gitlab.com/joao.p.rodrigo/pico-drops/